Japanese honing techniques are renowned for their ability to produce incredibly sharp and durable blades, a critical asset for hunting knives that demand peak performance. While many Western methods focus on aggressive sharpening, the Japanese approach emphasizes meticulous care and a refined understanding of the blade’s geometry. This article delves into the nuances of Japanese honing techniques specifically tailored for hunting knives, explaining the processes, tools, and philosophy behind achieving a razor-sharp edge that will serve you faithfully in the field.
Understanding the Importance of Honing (Not Sharpening)

Before we dive into techniques, let’s clarify the distinction between sharpening and honing. Sharpening removes material from the blade, changing its profile. Honing, on the other hand, realigns the microscopic edge of the blade, restoring its sharpness without altering the overall shape. For hunting knives, honing is crucial for maintaining the edge between uses, extending the life of your blade, and minimizing the need for more drastic sharpening. Regular honing is akin to preventative maintenance for your knife, keeping it at its peak performance and preventing the need for more extensive work later.
The Japanese Approach: Patience and Precision
Japanese honing emphasizes patience and precision. It’s a meditative process, far removed from the aggressive strokes of some Western sharpening techniques. The goal isn’t just a sharp edge, but a consistently sharp edge that lasts. This is achieved through a combination of specific tools, angles, and movements. We’ll explore each of these elements in detail.
Essential Tools for Japanese Honing
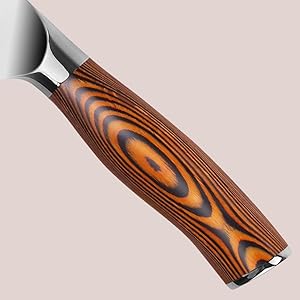
The cornerstone of Japanese honing is the whetstone, often referred to as a “sharpening stone” although, as we’ve discussed, honing is the more accurate term in this context. Japanese whetstones come in various grits, from coarse to ultra-fine. You’ll typically need at least two stones: a coarser one for initial sharpening (if needed) and a finer one for honing. The most common combination involves a medium grit (around 1000-2000 grit) and a fine grit (around 6000-8000 grit). Beyond this, very fine grit stones (above 10,000 grit) are used for truly exceptional finishes. In addition to whetstones, you’ll need a honing guide (optional but highly recommended for consistency), a water container, and a soft cloth for drying your knife.
The Honing Process: A Step-by-Step Guide
The following steps outline a basic honing process using two whetstones: a medium and a fine grit stone.
- Preparation: Soak your whetstones in water for at least 15 minutes before use. This allows the stone to become saturated, providing a smoother surface and preventing damage to the blade.
- Medium Grit Honing: Using a consistent angle (typically 15-20 degrees), gently draw the blade across the medium grit stone. Use even pressure and avoid applying excessive force. Focus on maintaining consistent contact between the blade and the stone. Repeat this process on both sides of the blade, aiming for an even number of strokes per side.
- Fine Grit Honing: Once the blade is honed on the medium grit stone, switch to the fine grit stone. Repeat the process, using the same angle and even pressure. The goal here is to refine the edge and create a more polished and sharper surface. You should notice a distinct improvement in sharpness after this step.
- Stropping (Optional): For an extremely sharp and polished edge, you can finish the process by stropping your blade on a leather strop loaded with honing compound. This removes any remaining burrs and adds a final level of refinement.
- Cleaning and Drying: Clean your blade and stones thoroughly with water and a soft cloth. Store your stones appropriately to prevent damage.
The Importance of Angle and Pressure
Maintaining a consistent angle throughout the honing process is crucial. Using a honing guide can significantly help here, particularly for beginners. Incorrect angles can lead to uneven sharpening, weakening the blade and making it prone to chipping. Similarly, excessive pressure can damage the blade or the whetstone. Apply firm yet gentle pressure – the weight of the knife should be enough; avoid pushing too hard. The process should be smooth and controlled rather than aggressive.
Addressing Specific Blade Geometries

Hunting knives come with diverse blade geometries (e.g., convex, recurve, hollow grind), each requiring a slight adaptation of the honing technique. While the basic principles remain consistent, the precise angle and stroke might need to be adjusted based on the specific blade profile. Researching the specific geometry of your hunting knife and adapting your honing accordingly will significantly enhance results. Always err on the side of caution, employing lighter pressure and fewer strokes when dealing with intricate blade shapes.
Maintaining Your Hunting Knife: Beyond Honing
Regular honing is key to maintaining a sharp hunting knife, but it’s only part of the equation. Proper cleaning and storage are equally important. After each use, thoroughly clean your knife with warm soapy water and dry it immediately. Store it in a protective sheath to prevent damage and corrosion. Protecting your blade from the elements will help you to maintain your investment for years to come.
Conclusion: Mastering the Art of Japanese Honing

Mastering Japanese honing techniques for your hunting knife takes time and practice. However, the resulting sharpness, durability, and refined edge are well worth the effort. By understanding the principles behind the process, employing appropriate tools, and exercising patience, you can ensure your hunting knife remains a reliable and effective tool for years to come. Embrace the precision, the attention to detail, and the meditative nature of Japanese honing, and your knife will reward you with superior performance in the field.